
Review · LOMBOK & RINJANI ADVENTURES FROM KUTA
Rinjani trekking 2D 1N RIM
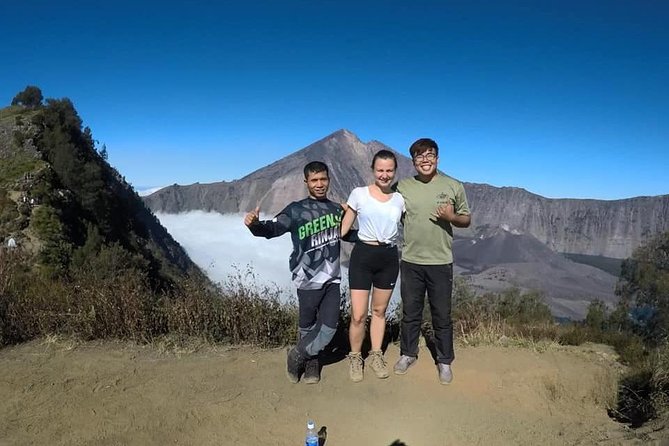
A volcano rim at sunrise? It is a wow-moment kind of hike. What makes this 2D1N Rinjani experience especially interesting is the private guide and porter setup plus the crater rim camping with views stretching toward the Gilis and Bali. One thing to consider up front: the trail has stony, steep stretches and you will need to show up with the right footwear and a few key items that are not included.
I really like how the itinerary is paced through real terrain, from coffee and jungle shade to higher open savanna, with planned breaks at named points like Pos 2 and Pos 3. I also like that meals and drinks are handled on the trek, including lunch cooked on route and plenty of water and snacks. The tradeoff is simple: you are responsible for your daily pack and some clothing basics, and you will be walking in humid, sun-exposed conditions at times.
If you want an authentic Lombok mountain adventure without doing the logistics yourself, this is a strong option. Just go in with eyes open about effort level, and pack smart so the experience stays fun instead of annoying.
Key highlights worth your attention
- Private pacing: you hike at a rhythm that fits your group, not a fast conveyor-belt schedule
- Crater rim camping at Pelawangan 1: overnight under the stars with dinner handled by you on-site
- Named stops and support: breaks at Pos 2 and Pos 3, plus food, fruit, and drinks along the way
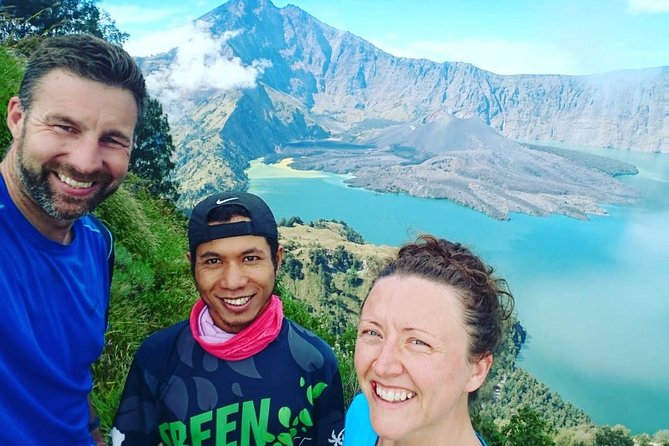
- Sunset and sunrise viewing: Gilis and Bali’s Mt. Agung at sunset, lake views at sunrise
- Porters do real work: they cook lunch at Pos 3 and handle camp setup gear
- Monkey awareness: brown monkeys may try to steal small items, so keep your bag close
Other crossings to Lombok and the Gilis
- Anggrek Putih Lombok Cooking Class★ 5.0 · 253 reviews
- Day Trip Gili Trawangan, Gili Meno, Gili Air (Depart Lombok)★ 5.0 · 167 reviews
- Lombok Private Customize Tour★ 4.5 · 144 reviews
- Mount Rinjani 2 Days 1 Night Senaru Crater Rim★ 5.0 · 131 reviews
Entering Rinjani From Senaru: What Makes This 2D1N Trek Work
This hike is designed around one clear goal: get you from Senaru up to Mt. Rinjani’s crater rim, then bring you back down over two days without turning it into a complicated travel project. The route is not just a “walk and see” checklist. It is a progression, first through rainforest shade and then into higher, drier open hills, which changes how the hike feels hour by hour.
I also like that it is a private tour. That matters because your comfort level can change fast at altitude, even when the itinerary is described as relatively gentle compared with summit routes. If your group is slower, you are not forced into a rigid pace.
On the service side, Green Rinjani Trekking is clearly built around getting everything moving for you: guide, porters, camp gear, food, and transfers. In the feedback I analyzed, names like Dana, Adi, Yun, Ubang, and Sri came up repeatedly for supportive guiding and team care, which is exactly what you want on a volcano trek.
From the meeting point to a 7:30am start: timing that actually helps
Your day begins early. The activity meeting time is listed as 7:00am, and the trek typically starts around 7:30am to 8:00am. That timing is practical because it helps you catch the cooler morning before the hike leans more exposed to sun.
You start at RTC Senaru Village Pos 1, with registration at the Rinjani Trekking Centre (Pos 1). From there, your first portion of the hike is about getting your legs working while still enjoying easy early scenery, including open views and plant life linked to local life like coffee trees and bamboo.
The best part of the early start is mental. When you begin cool, you stay calmer as the climb ramps up later. You also have more daylight for the stony sections and the time it takes to reach the crater rim.
Day 1, Pos 1 to Pos 2: coffee, bamboo, and the rainforest gate
The first stretch gives you a quick education in Lombok’s terrain. You start with roughly the first 30 minutes in open views, where you pass vegetation such as coffee and bamboo, along with plants used by local people. Then you reach the gate to the tropical rainforest, which is where the trail starts feeling more sheltered.
After a short break at the rainforest gate (about 15 minutes), you continue deeper into the jungle where humidity rises and shade does the heavy lifting. This is where the hike turns more “workmanlike” than scenic postcard. You are moving through humid air, watching your footing, and adjusting to the steady uphill rhythm.
You also get nature distractions that feel real, not staged. Big tree sounds and black or brown monkeys are mentioned on the way, and it is common to hear more than you see. If you like wildlife moments, this is the section that can surprise you.
Pos 2 (around 1,500m), Montong Satas is your first recovery break. It is a chance to lay down and reset. Here you are served soft drinks, crackers, and fresh fruit like banana and pineapple while you wait for your guide and porters to be ready.
What to watch for: this is still a climbing day, so do not overdo the rest. Take the break, hydrate, and get moving again.
Pos 2 to Pos 3: humidity, strawberries in season, and monkey behavior
From Pos 2 to Pos 3 (around 2,000m), Mondokan Lokak, the plan calls for about two hours through the rainforest. You are higher now, and the trail is gradually pushing you toward thinner air and steeper sensations.
One neat detail in the route notes is the mention of local strawberries along the way in June, July, and August. If you hike during those months, you might spot them growing along the trail. Even if you do not, the point is useful: the hike timing can affect what you see.
At Pos 3, things shift from “break and snack” to “food and fueling.” Lunch is cooked by your porter team. Fresh fruits and biscuits are served as snacks. It is also a point where you need to stay alert because brown monkeys live here, and they sometimes try to steal small backpacks.
Here is my practical advice: keep your small day items inside a zippered pocket or closed bag, and keep it on you when you stop. It is not about being paranoid. It is just easier than cleaning up later or losing something important.
More walking, less driving
Pos 3 to the crater rim: savanna views, steep steps, and Cemara Lima
After about 1.5 hours of resting at Pos 3, the trail continues toward the crater rim at 2,641m. A key change happens as you climb: you eventually move out of the tropical rainforest and onto savanna-like hills with more open views.
This is where the hike starts rewarding your effort. You can see more. The air can feel different. And the route becomes visibly steeper and more stony. The notes mention a trail that is quiet steep, and there is a lot of footing work, especially as you approach the rim.
There is a planned break at Cemara Lima, described as taking a moment with views over about 40% of Senaru village. Then you keep going toward Pelawangan 1 Senaru Crater Rim, the overnight camping area.
The final push matters because it sets up your night. When you reach camp, you get time to settle, enjoy the rim air, and prepare for sunset and the stars. This is also where a headlamp or flashlight becomes important. Even though some gear is included, you still need light for camp movement at night, and a torch is listed as not included.
Camping at Pelawangan 1: what you get, what you must bring
Once you reach Pelawangan 1, you camp overnight with your own dinner. In terms of included gear, you get a full overnight kit: tent, sleeping bag, camping pillow, camping chair and table, toilet tent, and sleeping mat. That is a big value component because you are not renting or hauling heavy camp gear.
Sleeping under stars is also part of the experience, and that is not just marketing talk. The rim nights can be cold and windy, so having a proper sleeping bag matters.
One more thing: the tour includes transfers, which helps because you are not expected to coordinate drivers on your own. Pickups are part of the service flow.
Night safety is mostly about common sense. Stay close to your guide and porters, keep your small belongings secured, and handle camp tasks when you can still see well. If your group is bringing extra luggage, there is an optional add-on for an extra porter at $22/day.
Sunset over the Gilis and Bali’s Mt. Agung: the rim payoff
The crater rim view is the core reason people choose this trek. From the rim, you watch sunset over the three Gilis and Bali’s Mt. Agung. The route notes also describe sunrise from the rim the next day with a valley smoke effect around Mt. Sanggka Reyang. That is the kind of visual that makes you stop talking and just watch.
You are also camping near a centerpiece feature: Lake Segara Anak. The plan specifically calls out the lake view at sunrise. It is a dramatic setting because the lake sits inside the crater system, so you feel like you are looking into a volcanic bowl.
What makes it special for your trip planning is that you do not need extra detours for photos. The best moments are timed around your overnight stay. Day 1 is mainly for getting up and arriving by the time the sunset can happen. Day 2 is mainly for getting down after sunrise and pictures.
If you are the type who wants views but also cares about comfort, this setup is a nice balance. You earn the view with a climb, then you do not need additional excursions to enjoy it.
Day 2 sunrise and the Lake Segara Anak moments
Day 2 starts with breakfast and enjoying the sunrise. You are supposed to take pictures with the lake scenery, then start the descent. Sunrise is one more reason this is worth doing as an overnight, not a one-day scramble.
The itinerary notes the descent takes about 5 to 6 hours back down to Senaru village. It also notes you should return to the trekking centre around 12:30pm to 1:00pm, then you get a private car to your next destination.
That timing can be a big deal if you have a planned hotel check-in or the rest of your Lombok itinerary. Instead of arriving in the afternoon with no clarity, you have a clearer end-of-trek window.
The descent: choose your pace and protect your knees
Going down is often harder than going up, not because it is always steeper, but because you are constantly controlling your steps on stony ground. The notes on the day 1 trail mention stony and steep sections, and that same ground turns into a leg workout on the way back.
A private setup helps here. You can adjust pace without someone breathing down your neck. If you need frequent micro-breaks, ask your guide. The guides listed in feedback names, such as Dana, Adi, Yun, Ubang, and Sri, are repeatedly highlighted for attentive support, which matters during descent when people get tired and sloppy.
Practical tip: keep your daily pack light. If your plan includes extra items you do not need, save the weight for souvenirs after the trek.
Price and value: what $205 covers, and what it does not
At $205 for roughly 2 days, the value comes from what is bundled. You are paying for more than the hike. You are paying for guide and porter labor, transfers, and a full set of camp equipment like tent and sleeping mat plus food and drinks.
Included items that matter in real life:
- Breakfast, lunch, dinner, and snacks
- Bottled water, coffee or tea
- Alcoholic beverages are listed as included
- A local guide and porters
- Pick up and transfer
- Overnight gear (tent, sleeping bag, pillow, chair and table, toilet tent, sleeping mat)
Not included items are also important:
- Headlamp or flashlight
- Long pants or trousers
- A small daily pack
- Trekking shoes (you bring these)
- Trekking jacket
So if you already own boots, a headlamp, and a small day pack, your net cost stays reasonable. If you have to buy everything in Lombok, the hike becomes more expensive than the headline price.
Also think about tipping. Tips are listed as not included, which means you will likely want to budget for it if your guide and porters do a great job. With volcano treks, their work can be intense and constant.
How private guiding changes the hike
I like private tours for volcano hikes because the experience becomes about your needs, not just the group schedule. With a private guide, you can slow down for breaks, ask questions about what you are seeing, and manage effort when humidity feels high.
This is where feedback about guides helps you make a decision. Names like Dana are described as supportive, Adi is described as patient and attentive, and Ubang is described as exceptionally attentive and helpful. Those are the exact qualities you want when the trail is steep and you are tired, especially if you are not used to hiking at elevation.
Porters also matter because you are not just enjoying the view. You are using their setup so you can focus on the climb. The setup and cooking at Pos 3, plus camp handling, is a big part of why this trek feels manageable for many people.
What to pack: the non-included basics that can ruin your comfort
Even though the overnight gear is included, you still need your own trekking comfort kit. The tour notes explicitly say trekking shoes are not included, as well as a trekking jacket and headlamp.
Here is what you should plan to bring based on what is listed:
- A headlamp or flashlight (torch)
- Trekking shoes (or equivalent proper footwear)
- Long pants or trousers
- A trekking jacket or wind proof layer, especially for night
- A small daily pack for your own items
The provided packing notes also suggest practical extras like sunblock, a cap or hat, sunglasses, insect repellent, and a small towel. They also mention trekking poles as optional.
One tiny but useful strategy: keep the camera and anything small that could attract monkey attention in a closed pocket or zippered bag when you stop at Pos 3.
Who this trek is best for (and who might want a different option)
This trek fits best if you:
- Want a signature Lombok experience centered on Rinjani crater views
- Are comfortable with a two-day hike that includes steep, stony sections
- Prefer having a private guide and porters instead of DIY camping
- Care about sunrise and sunset moments, not just summit chasing
It may feel like a lot if you:
- Struggle with steep descents and uneven footing
- Do not own trekking shoes or a headlamp and would be forced to improvise
- Are sensitive to humid rainforest walking and sun-exposed higher sections
The route is not described as an extreme summit push, but it still requires moderate physical fitness. If you can walk uphill steadily and manage knee stress on the way down, you will likely enjoy this.
Should you book Green Rinjani’s 2D1N Rinjani crater rim trek?
I would book this if you want a solid, value-heavy package: guide plus porters plus camp gear plus meals, with the main reward stacked right into your overnight timing. The repeated positive mentions of guide support and porter performance, including names like Dana, Adi, Yun, Ubang, and Sri, are a good sign that the team culture matches what you need on a volcano.
I would think twice if you are missing key gear like trekking shoes and a headlamp, because the not-included list is exactly where comfort and safety start. Also consider the monkey factor at Pos 3. It is not a deal breaker, but it does require you to manage your belongings.
If you want sunrise over Lake Segara Anak, sunset toward the Gilis and Mt. Agung, and a crater rim night you can actually enjoy, this is a smart way to do it.
FAQ
What is the duration of the Rinjani trek?
It is listed as about 2 days (2D1N).
What time does the trek start?
The meeting time is 7:00am, and the trek begins around 7:30am to 8:00am.
Where does the trek start and end?
It starts at Senaru Village (with registration at RTC Senaru village Pos 1) and the hike returns back to Senaru. The activity ends back at the meeting point, with private car transfer afterward to your next destination.
What trekking gear is included for the overnight stay?
Included gear covers tent, sleeping bag, camping pillow, camping chair and table, toilet tent, and sleeping mat.
Are meals and drinks included?
Yes. The package includes food and drink, plus breakfast, lunch, dinner, snacks, bottled water, coffee and/or tea, and alcoholic beverages.
Do I need to bring my own torch or headlamp?
Yes. A headlamp or hand torch is listed as not included.
Is the tour private?
Yes. It is described as a private tour/activity, with only your group participating.
Is there free cancellation, and how much notice is needed?
Free cancellation is listed. You can cancel up to 24 hours in advance of the experience start time for a full refund. If you cancel less than 24 hours before, the amount paid will not be refunded.
More Walking Around Lombok
- 2D1N Senaru Crater Rim Trekking
★ 5.0 · 178 reviews - Rinjani Trekking 3D2N Summit
★ 4.5 · 85 reviews - 3D/2N Rinjani trekking summit,lake and hot springs.
★ 5.0 · 85 reviews - Rinjani Trekking 3 Days 2 Nights (Sembalun – Senaru)
★ 5.0 · 84 reviews
More Tour Reviews in Lombok
- Tetebatu Walking Tour – Rice Terraces, Waterfall & Monkey Forest
★ 5.0 · 349 reviews - Anggrek Putih Lombok Cooking Class
★ 5.0 · 253 reviews - Day Trip 5 Secret Gilis : Layar, Rengit, Nanggu, Tangkong, Kedis
★ 5.0 · 192 reviews - 2D1N Senaru Crater Rim Trekking
★ 5.0 · 178 reviews
Across to Lombok
- Anggrek Putih Lombok Cooking Class
★ 5.0 · 253 reviews - Day Trip Gili Trawangan, Gili Meno, Gili Air (Depart Lombok)
★ 5.0 · 167 reviews - Lombok Private Customize Tour
★ 4.5 · 144 reviews - Mount Rinjani 2 Days 1 Night Senaru Crater Rim
★ 5.0 · 131 reviews
Fresh on the Lombok pages
Lombok & Rinjani Adventures from Kuta, compared.
 ★ 5.0Gili Island Snorkeling Trip – Gili Trawangan, Gili Meno, & Gili Air, From LombokFrom $88330 reviews
 ★ 5.0Anggrek Putih Lombok Cooking ClassFrom $30253 reviews
 ★ 5.0Day Trip Gili Trawangan, Gili Meno, Gili Air (Depart Lombok)From $97167 reviews
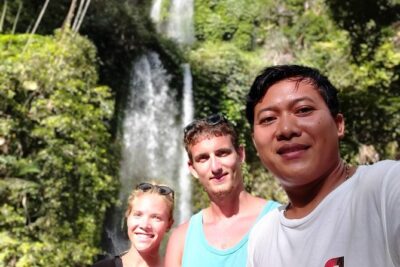 ★ 4.5Lombok Private Customize TourFrom $45144 reviews
Mount Rinjani 2 Days 1 Night Senaru Crater RimFrom $165131 reviews
★ 4.5Lombok Private Customize TourFrom $45144 reviews
Mount Rinjani 2 Days 1 Night Senaru Crater RimFrom $165131 reviews
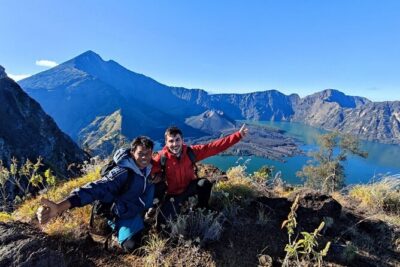 ★ 5.03D-2N Explore Mount Rinjani – Summit -Lake and HotspringFrom $235112 reviews
 ★ 5.0Lombok Pink Beach Boat Trip (Full Day + Snorkeling)From $88104 reviews
 ★ 4.5Rinjani Trekking 3D2N SummitFrom $24385 reviews
More Kuta tours like this one